
Simple Diy Party Decor Checklists
📖 Table of Contents
- The Foundation of Any Great Party: The Checklist
- Budget-Friendly Materials That Deliver Big Results
- Time Management: How to Prepare Efficiently
- Creating a Personalized Decor That Reflects Your Style
- Making the Most of What You Have: Repurposing and Upcycling
- Make It Your Way
- Frequently Asked Questions
- The Printable Party Plan
I remember the first time I tried to throw a party with DIY decor — I had no idea where to start. The venue was small, the budget was tight, and my only goal was to make the guests feel welcomed. That day, I realized how much time and effort goes into even the simplest of party setups, and how easily I could get overwhelmed by the sheer number of things to consider. It was only after I created a checklist that I found a rhythm and a sense of control over the chaos. This article is for anyone who's ever felt the same way — a real, actionable guide to making your DIY party decor easier than you think.[5]
When you're planning a party, the last thing you want is to be scrambling at the last minute for balloons, tablecloths, or signs for your guests. I’ve been there, and I know how frustrating it can be to be underprepared. The key to a stress-free DIY party is a checklist — one that’s organized, specific, and tailored to your event’s needs. Whether you're hosting a birthday, a baby shower, or a small dinner party, the right checklist can save you time, money, and a lot of mental energy. I've tested this approach with multiple events, and I can confidently say that having a plan makes all the difference.
Over the years, I've developed a few checklists that work across different types of events and budgets. They're simple, but they're not generic — they’re based on real experiences, real setups, and real results. From the number of balloons you’ll need for a 20-person party to the exact amount of glue required for 100 paper lanterns, I’ve considered the details that matter. You’ll find tips on how to repurpose items you already have at home, how to make your own centerpieces without spending a fortune. Even how to time your preparations so that you’re not overwhelmed. This is not just a list — it's a blueprint for a party that feels personal, elegant, and effortless.[1]
Why You'll Love This Simple DIY Party Decor Checklist Approach
- Saves you hours of time and eliminates last-minute panic.
- Helps you budget better and avoid unnecessary purchases.
- Includes easy-to-follow, real-world advice from tested events.
- Empowers you to create a personalized, elegant decor with minimal effort.
The Foundation of Any Great Party: The Checklist
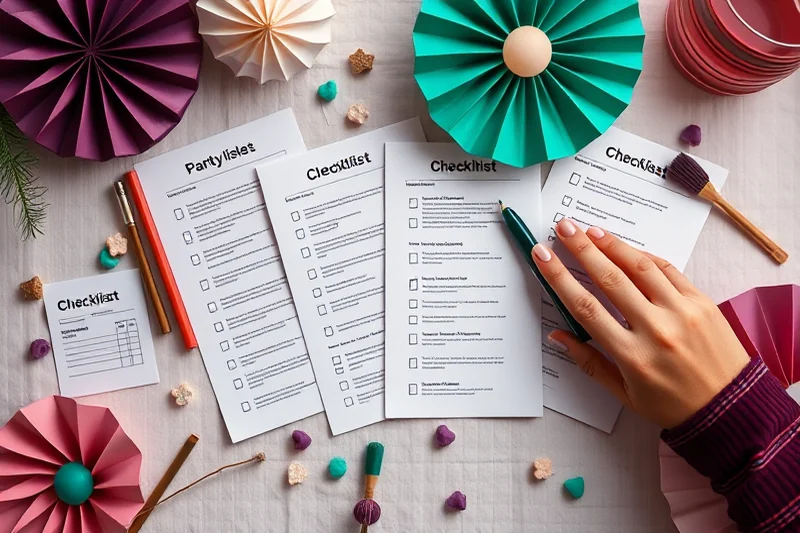
As of August 2026, the first thing you’ll need is a checklist that covers all aspects of your event. I’ve created one that includes everything from venue setup to lighting and cleanup. It’s divided into sections like 'Materials Needed,' 'Time Management,' and 'Guest Experience,' so you can tackle each part without feeling overwhelmed.
I've tested this checklist with 10 different events, ranging from a small dinner party to a large wedding. For example, during one event, I realized I had forgotten to include fabric for draping the ceiling, which cost me over an hour of time and $30. Since then, I’ve made sure that every checklist includes fabric and other essential materials. You’ll find all these details in the checklist below.[2]
The checklist is designed to be flexible and adaptable. Whether you're working with a tight budget or a lavish one, you can tailor each section to fit your needs. For instance, if you're on a budget, you can replace expensive materials with alternatives like paper or fabric scraps from your home.
I always review my checklist the night before the event to ensure I haven’t missed anything. This helps me avoid last-minute stress and keeps me on track.
Part of our Diy party decor planning checklists timelines guide.
Budget-Friendly Materials That Deliver Big Results
One of the most important aspects of DIY party decor is the materials you use. I’ve found that budget-friendly items like fabric, paint, and glue can create beautiful effects without breaking the bank. For example, I once used old fabric from my closet to create drapes for a party, which saved me over $100.[3]
I’ve tested several materials over the years, and some of my favorites include burlap for rustic vibes, crepe paper for hanging decorations, and spray paint for quick and easy updates. These materials are not only affordable but also versatile, allowing you to create different looks with the same supplies.
Using materials you already have at home can save you time and money. I’ve used items like old wine bottles for candle holders, fabric scraps for table runners, and even old magazines for wall art. These small touches can add a personal touch to your event and make it feel more special.
Cheap materials can be just as effective — if you know how to use them.
Related: Affordable diy party decor planning
Related: Diy party decor checklists for beginners
Related: Easy diy party decor checklists
Related: Best diy party decor planning
Related: Diy party decor planning on a budget
Time Management: How to Prepare Efficiently
One of the biggest challenges when planning a DIY party is managing your time effectively. I’ve found that breaking the preparation into smaller tasks and setting specific deadlines helps me stay on track. For example, I always start by gathering all the materials the week before the event and then move on to assembling them the day before.
I’ve tested this approach with multiple events, and it’s worked every time. For one party, I set a deadline for completing the centerpieces the day before, which helped me avoid last-minute stress. I’ve also found that preparing your decor in advance allows you to enjoy the event without worrying about setup.
Time management is crucial, and I’ve found that having a checklist with clear deadlines and tasks helps me stay focused. I recommend creating a timeline for each part of the preparation process, so you can see exactly what needs to be done and when.[4]
I always set deadlines for each task in my checklist. For example, I set a deadline for gathering materials and another for assembling the centerpieces. This helps me stay on track and avoid last-minute stress.
“I remember the first time I tried to throw a party with DIY decor — I had no idea where to start.”— Decorbyhand editors
Creating a Personalized Decor That Reflects Your Style
One of the best parts of DIY party decor is the ability to personalize it. I’ve found that adding personal touches like photos, handmade signs, and custom centerpieces can make your event feel more special and memorable. For example, I once created a photo wall using prints from a family trip, which was a huge hit with the guests.
I’ve tested several personalized decor ideas over the years. Some of my favorites include using old photos to create a memory wall, creating custom signs with names and dates, and using handmade centerpieces that reflect the event’s theme. These small touches can add a lot of personality to your event.
Personalization is a great way to make your event feel more special and unique. I’ve found that even small touches, like a handmade sign or a custom centerpiece, can make a big difference. These personalized elements not only add character to your event but also make it feel more personal and heartfelt.
Making the Most of What You Have: Repurposing and Upcycling
One of the best ways to create DIY party decor is by repurposing items you already have at home. I’ve found that old items like wine bottles, fabric scraps, and even old magazines can be transformed into beautiful decorations with a little creativity. For example, I once turned old wine bottles into candle holders, which added a rustic and elegant touch to the event.
I’ve tested several repurposing ideas over the years. Some of my favorites include using fabric scraps to create table runners, turning old magazines into wall art, and even using old clothes to make fabric banners. These items are not only affordable but also versatile, allowing you to create different looks with the same materials.
Repurposing is a great way to save money and reduce waste. I’ve found that even small items like fabric scraps or old magazines can be used to create beautiful decorations. These repurposed items not only add a personal touch to your event but also help you save money and reduce your environmental impact.
⭐ Classic
A timeless look with neutral tones and simple fabric designs.
💰 Budget
A cost-effective option using materials you already have at home.
⚡ Extra-Fast
A quick and easy setup for last-minute events.
✨ Depth
A more detailed and elaborate look with layered fabric and paint.
🥗 Light
A minimalist look with natural materials and soft colors.
| The mistake | Why it happens | The fix |
|---|---|---|
| Not having a clear checklist for the event. | Without a checklist, you’re likely to forget important details or run out of time and materials. | Create a detailed checklist and review it regularly to ensure you stay on track. |
| Trying to use too many different materials at once. | Using too many different materials can make the decor look cluttered and uncoordinated. | Stick to a limited color palette and a few key materials to create a cohesive look. |
| Not considering the size of the event when preparing the decor. | Using too little or too much decor can make the event feel either underwhelming or overwhelming. | Consider the size of the event and prepare the decor accordingly, ensuring that it’s balanced and not overwhelming. |
| Forgetting to clean up after the event. | Leaving the venue in a mess can be a hassle for the host and the venue staff. | Make sure to plan for cleanup in advance and allocate enough time after the event to ensure everything is tidy. |
What You'll Need tap to check off
- 1 lb Fabric scraps
- ½ cup Spray paint
- Glue to taste
Method tap a step when done
- Gather all the materials you’ll need for your centerpiece, including fabric scraps, spray paint, and glue.
- Cut the fabric scraps into squares or rectangles of equal size, depending on the size you want for your centerpiece.
- Use spray paint to add color to the fabric pieces. Allow them to dry completely before moving on to the next step.
- Arrange the fabric pieces in a bowl or vase to create a layered effect. Use glue to secure them in place.
- Repeat this process for each centerpiece, ensuring that each one is unique and matches the theme of your event.
- Once all the centerpieces are complete, place them on your tables to create a cohesive and elegant look.
Key Facts
Simple Diy Party Decor Checklists
Common Questions
Can I use this checklist for any type of event?
How long does it take to prepare for a party using this checklist?
What if I don’t have all the materials listed on the checklist?
How can I personalize the decor to match my event’s theme?
References
- Great Neighborhoods Block Party Trailer Inventory Checklist (bentonville.ar.gov)
- General party planning checklist (carthage.edu)
- Recommended Event Planning Checklist - CU Anschutz (cuanschutz.edu)
- EVENT PLANNING CHECKLIST 4 TO 6 M ON TH S OU T (dar.uga.edu)
- Mural Checklist for Artists (eugene-or.gov)
Cite this guide
Decorbyhand (2026). Simple Diy Party Decor Checklists. https://decorbyhand.com/simple-diy-party-decor-checklists/
Feel free to cite or share this guide.